Connecting to DMIT Instance via XShell
XShell is a powerful SSH client supporting Windows system. You can use XShell to connect to your DMIT instance.
Download XShell
You can download the XShell client from the official website.
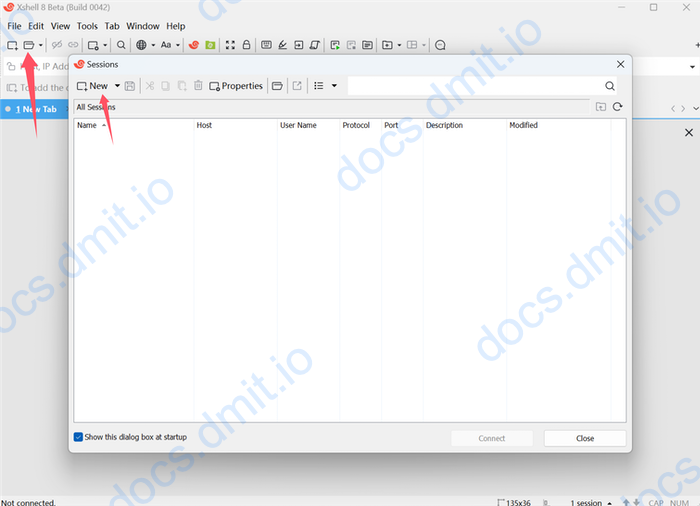
Add New Host
- Open XShell, click the folder icon in the top left corner, and select
New.
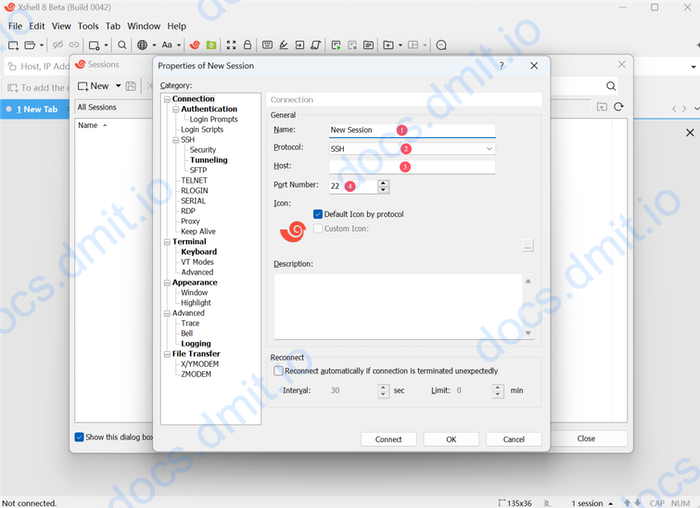
Configure Host Information
Configure Host Information
- Name: The name of your instance (name it according to your preference) ⓵
- Protocol: Select
SSH⓶ - Host: The IP address of your instance ⓷
- Port: The default SSH port is
22⓸
Configure User Information
Configure User Information
- Switch to the
User Authenticationtab. - Enter the username for your instance (default is root) ⓵
- Check the
Public Keyoption ⓶ - Click the
Connectbutton at the bottom to connect to the instance.

Connect and Add Your SSH Key
Prepare your SSH private key. If this is your first time using a DMIT instance, you can refer to this guide to add or generate an SSH key.
Add SSH Key
- Follow the above steps to configure host and user information.
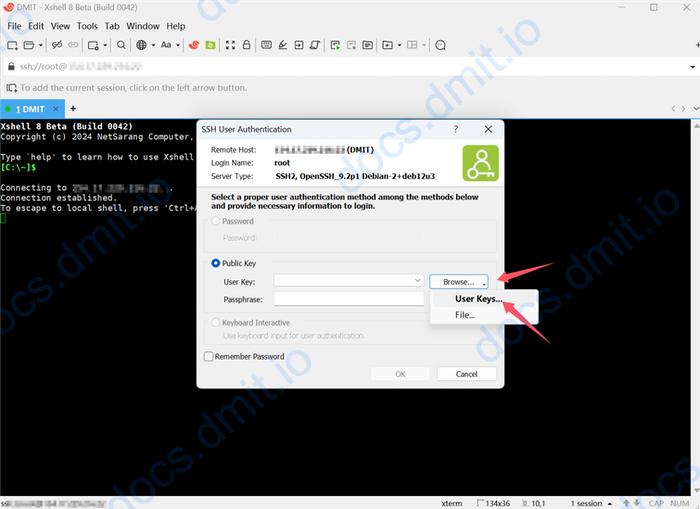
- Click the
Connectbutton to connect to the instance. - In the pop-up window, select the
Public Keyoption. - Click the
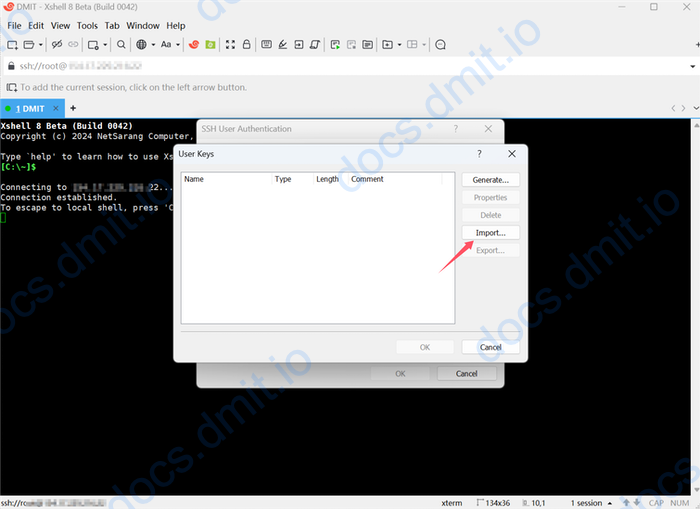
Browsebutton and selectUser Key. - In the new window, select
Importand then choose your SSH private key file (.pem format). - After import, click
OK. - Your SSH key will now be added to XShell.
Getting SSH Key
If you chose Generate SSH Key after order when purchasing a DMIT instance, the system will automatically generate an SSH key and attach it to the instance. You can follow the tutorial here to obtain your SSH key and then add it to XShell as described above.
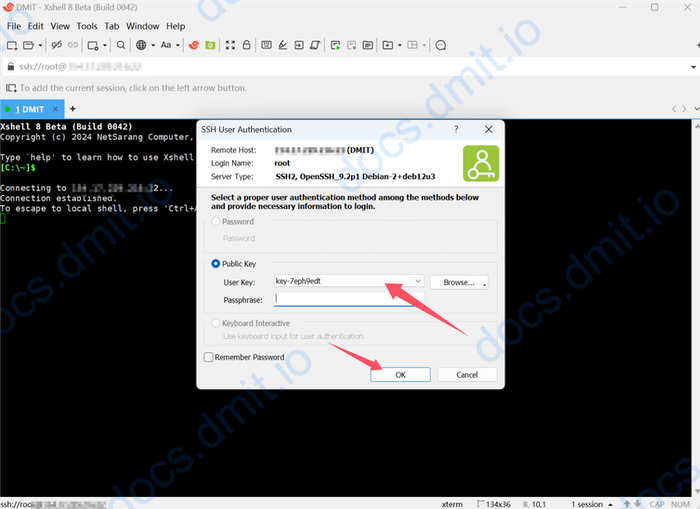
Connect to Instance
- Select the correct key.
- Optionally, check the
Remember Passwordoption. - Click the
OKbutton to connect to the instance. - Upon successful connection, you will see the instance’s console.