Applying SSH Keys to Instances
Once you've added SSH keys to your keystore, you can apply them to your instances.
Select Instance
You can find your instance on the client area homepage or in the instance list, then click the instance name to enter the instance details page.
Client Area Homepage | Instance List
Select SSH Key
Apply your SSH key to the instance.
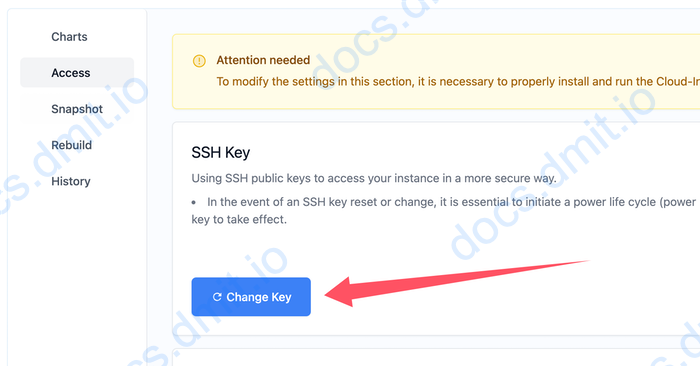
Click the Access option to enter the SSH key change page

Click the Change Key button
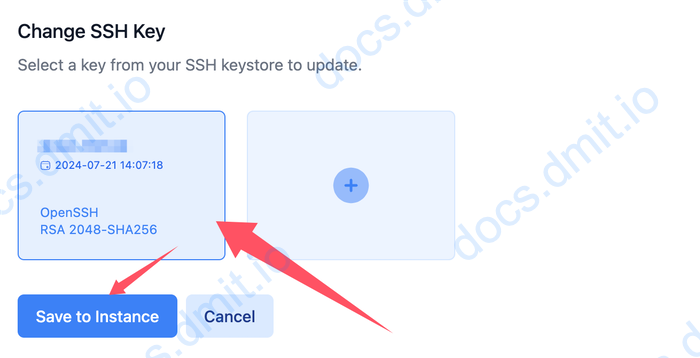
Select Your SSH Key
In the pop-up window, choose your SSH key and then click the Save to Instance button.
Note
If you haven't added any SSH keys, you will see only a blue box with a plus sign icon. Clicking it will redirect you to the keystore page where you can add SSH keys.
Alternatively, you can access the keystore page directly here.
For instructions on adding SSH keys, please refer to here.
After returning to this update SSH key page, the page will refresh automatically, and the SSH key you selected will appear in the list.
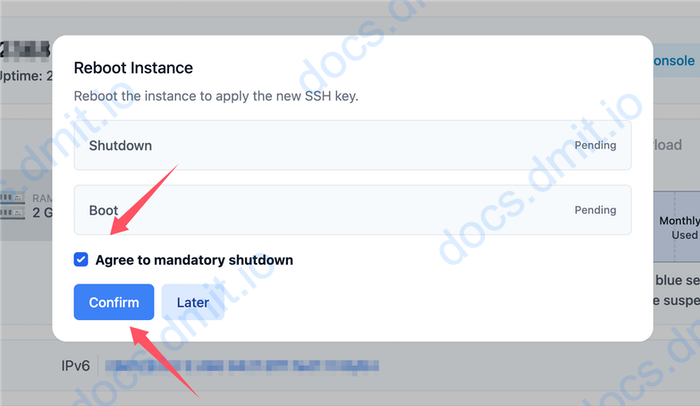
Restart the Instance to Apply Changes
Check Agree to mandatory Shutdown and then click the Confirm button to restart the instance.
Note
You can also restart the instance at a later time; the old SSH keys will remain valid until the instance is restarted.
Ensure that you perform the restart operation from the instance control panel, not from commands within the instance itself.